


Types of Data Exporting
In Database Tour, it is possible to export data from an open dataset, clipboard, a set of open datasets, or all selected tables at a time.
Note: Alternatively, you can use our another application for data exporting and migrating: Exportizer. It has a similar export interface and the same export capabilities, but simpler and cheaper. You can see the comparison of the applications.
Exporting Data from an Open Dataset
After opening the database, open a data set (table or SQL query). Be sure to stay on Data page for table and Result page for query. Then either click Export button ![]() , press Ctrl+E, or choose Tools | Export Data | Current Dataset... menu. Then, Export dialog window will appear. Go through the steps and click the corresponding button to execute the export procedure.
, press Ctrl+E, or choose Tools | Export Data | Current Dataset... menu. Then, Export dialog window will appear. Go through the steps and click the corresponding button to execute the export procedure.

Exporting Data from a Group of Open Datasets at a Time
Open several data sets (tables and/or SQL queries). Then either press Shift+Ctrl+E or choose Tools | Export Data | Open Datasets... menu. After that, Export dialog window will appear; go through the needed steps and click the corresponding button to start the export procedure.
Exporting Data from Several Selected Tables at a Time
Make sure the Object Browser is visible. In Object Browser, switch to Tables page. Right-click the table list and make sure the Multiple Selection option from the context menu is turned on. Select needed tables in the list. Then either click Export button ![]() or choose Tools | Export Data | Selected Tables... menu. After that, Export dialog window will appear; go through the needed steps and click the corresponding button to start the export procedure.
or choose Tools | Export Data | Selected Tables... menu. After that, Export dialog window will appear; go through the needed steps and click the corresponding button to start the export procedure.
Exporting Data from Clipboard
This way allows to export structured text data 'on-the-fly' without needing to create any additional files or database objects. No source database connection is required.
The interface is similar to creating schemas for text tables at the first step. Farther steps are the same as in the standard Export dialog (see above).
To start the process, copy the source data from a text file, Excel table or another source to clipboard and choose Tools | Export from Clipboard.... After defining the data structure, Export dialog window will appear; go through the needed steps and click the corresponding button to start the export procedure.
One of the possible applications of this type of exporting is to get a workaround when your source data are accessible through the 32-bit architecture but the target database is accessible through the 64-bit architecture, or vice versa. For example, you want to export the contents of a text file into the Firebird database, but the text ODBC driver is 32-bit and the Firebird client is 64-bit, so you cannot complete the task using the standard export/import means neither in the Database Tour 32-bit nor Database Tour 64-bit, and here this clipboard-based method of exporting can help.
Data Export Options
Target Formats and Format Specific Options
Table and Field Mappings
Logs and Error Handling
GUI Options
Close this window after clicking Export
When you select this option, the export dialog will be closed right after you click Export button; otherwise, the export dialog will remain open even when your action is done and you will be able to quickly change the options and repeat your action. This option is available only if you export data from one table.
Open target after successful exporting
When you select this option, and export operation was successful, then the target is opened by software, which is set as default software for the target type.
In multi-table exporting, it works differently depending on the target type:
- when exporting to HTML, and Create index file option is turned on, the index.html file (it contains hyperlinks to all exported files) is opened;
- when exporting to a server or multi-table file database, the last exported table is opened;
- for other cases, each exported file is opened.
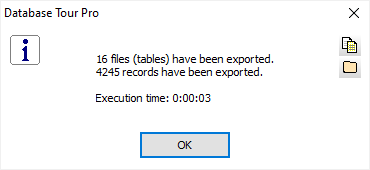
Note: After exporting is finished, a small dialog box with data exporting result appears where you can choose whether to show all exported files in their folder by Windows Explorer:
See also